A leaking shower behind the wall typically occurs when water infiltrates through deteriorated grout and silicone, subsequently travelling behind the tiles. The most frequent areas for leaks include the junction where the wall tiles meet the floor, internal corners, and joints within tiled recesses. Fortunately, these issues can often be rectified through regrouting and resealing, negating the need for tile removal. in rare instances, leaks may stem from a concealed pipe within the wall, requiring the expertise of a plumber, or from a compromised waterproofing membrane behind the tiles, which would necessitate tile removal.
This guide aims to assist you in pinpointing the source of the leak and determining the appropriate professional to rectify each specific issue.
- Common Cause: Water infiltrates through grout and silicone, particularly at the junction between the wall and floor, internal corners, and within tiled recesses.
- Leak Indicators: Look for signs of dampness outside the shower, which may manifest as bubbling paint, swollen skirting boards or door frames, a persistent musty odour, or stains on the ceiling below, which can sometimes be located some distance from the initial water entry point.
- Quick Assessment: Turn off the shower for a few days and monitor the damp patch daily. If it continues to expand while the shower remains dry, this could indicate a pipe leak.
- Who to Contact: For failed grout and silicone, a regrout and reseal are necessary. A plumber should be contacted for leaking pipes, drains, or taps, while a licensed waterproofer and tiler should be sought for compromised membranes. For leaking screen frames, consult a glazier.
- Repair Duration and Warranty: A complete shower seal typically takes between 4 to 5 hours and comes with a 10-year Ardex product warranty and a 7-year workmanship warranty.
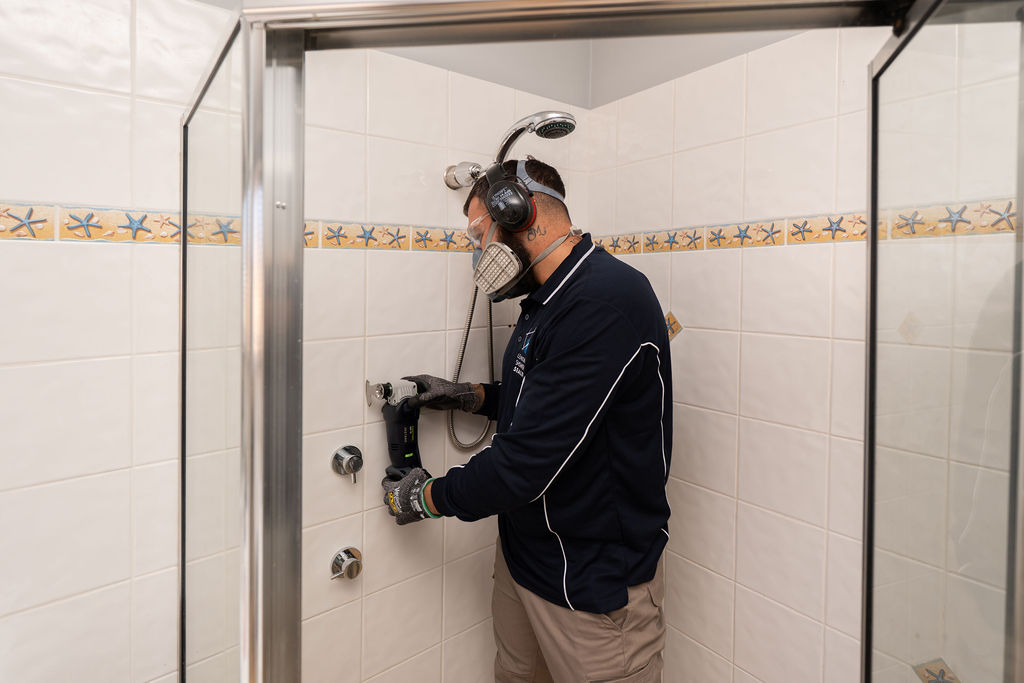
How to Detect Common Sources of Leaks Behind Shower Walls
The visible damp patch may not be situated directly at the source of the leak. Water can travel behind the tiles after seeping through a cracked grout line or a lifting silicone bead, meaning the joint requiring inspection may not be the closest one to the stain.
The following joints are frequently responsible for allowing water to penetrate behind a shower wall:
- The junction between the wall and floor: This area experiences the highest exposure to water and building movement, making it the most common failure point due to frequent cleaning.
- Internal corners: As buildings settle, corner joints may shift, often resulting in cracked silicone where two tiled walls meet.
- Around taps, mixers, and shower heads: A failed seal around these fittings can permit water to seep behind into the wall.
- Where wall tiles meet the shower screen: The joints surrounding the screen can flex during use, which may lead to the silicone gradually pulling away.
- Grout lines on the wall and in tiled recesses: Grout is porous, and once it becomes cracked, crumbled, or soft, water can easily penetrate.
What Actions Can You Take to Identify a Leak Behind Your Shower Wall?
Leaks behind the wall are generally not visible from within the shower, so it is essential to inspect the surrounding room and the area on the opposite side. Signs to examine include bubbling or peeling paint, swollen skirting boards or door frames, persistent musty odours, or stains on the ceiling below. For a comprehensive overview of warning signs, refer to our article on identifying shower leaks and the necessary follow-up actions.
Once you identify the damp area, its location and the timing of its appearance can often provide insights into the underlying cause:
- Damp appearing at skirting level just outside the shower: This often indicates a failed seal at the junction between the wall and floor.
- Damp that emerges after someone showers and dries out in between: This may point to issues with grout or silicone, particularly if the corners appear cracked, dark, or crumbling. A leak at the waste pipe may exhibit similar behaviour, as it typically becomes noticeable only when water drains.
- A damp patch that continues to grow when the shower has not been used for several days: This suggests a potential water pipe leak within the wall, which should be investigated by a licensed plumber.
- Damp that continues to spread even after proper regrouting and resealing, assuming a pipe leak has been ruled out: This usually indicates a failure of the membrane behind the tiles.
How to Perform a Simple Shower Leak Test Before Consulting a Professional
There is no necessity to cut into the wall to diagnose a leak. These assessments can be conducted at no cost over a few days.
- Document the damp patch with a photograph for future reference.
- If feasible, refrain from using the shower for a few days and take daily photographs of the damp area. If the dampness increases while the shower remains off, this indicates a possible pipe leak, and you should consult a plumber before proceeding with any shower repairs.
- If the damp mark remains constant or dries out while the shower is off, closely inspect the previously mentioned joints. Cracked, missing, or crumbling grout, along with silicone that appears blackened, lifted, or pulling away, will help identify the source of the leak. A mark that only appears after using the shower may still be due to grout, silicone, or the waste pipe.
- Share your photographs of the damp patch and the shower with us for further insights.
If you are still uncertain whether the issue lies with the grout or plumbing, we can recommend a trusted plumber to conduct a dye or pressure test, which can help differentiate between the two issues, or we can arrange to inspect the shower ourselves.
What Should You Do If You Notice Leaks Into the Ceiling or Below the Shower?
In upstairs bathrooms, the initial sign of a leak often presents as stains, bubbling paint, or sagging ceilings in the room below. Similar to damp walls, a ceiling stain typically does not appear directly beneath the leaking joint and may be fed by a grout line several metres away.
The same testing procedures apply for ceiling leaks, so utilise the dry shower test mentioned earlier as a first step. If water penetrates through the shower floor, refer to our article on regrouting and resealing shower floors for potential solutions.
If you notice staining near a downlight, light fixture, or power point, cease using the shower immediately and contact a licensed electrician. Repairs to the shower can be scheduled once the electrical issues have been resolved.
How to Select the Right Professional for Repairing a Leak Behind the Shower Wall
Failed Grout and Silicone: The Importance of Regrouting and Resealing
Most leaking shower walls we encounter are attributed to failed grout and silicone. Our comprehensive shower sealing process includes removing all wall and floor grout, regrouting with Ardex epoxy grout, resealing internal corners and junctions with fresh silicone, and sealing tap flanges. The existing tiles remain intact throughout this process. For a detailed description of this method, refer to our article on stopping a leaking shower without removing tiles, as well as our leaking shower repairs page.
Applying a new bead of silicone over an old one does not resolve the underlying issue. Silicone cannot properly adhere to old silicone, soap residue, or mould, which leads to future lifting and ongoing leakage. For more information on distinguishing a genuine shower reseal from a mere cover-up, see our related article.
Proper sealing also protects the wall behind it. When grout and silicone fail, water accumulates against the membrane, which can deteriorate at the corners and junctions. This is a primary reason to address leaks promptly. More details on the consequences of neglecting a leak can be found in our article on why you should never ignore a leaking shower.
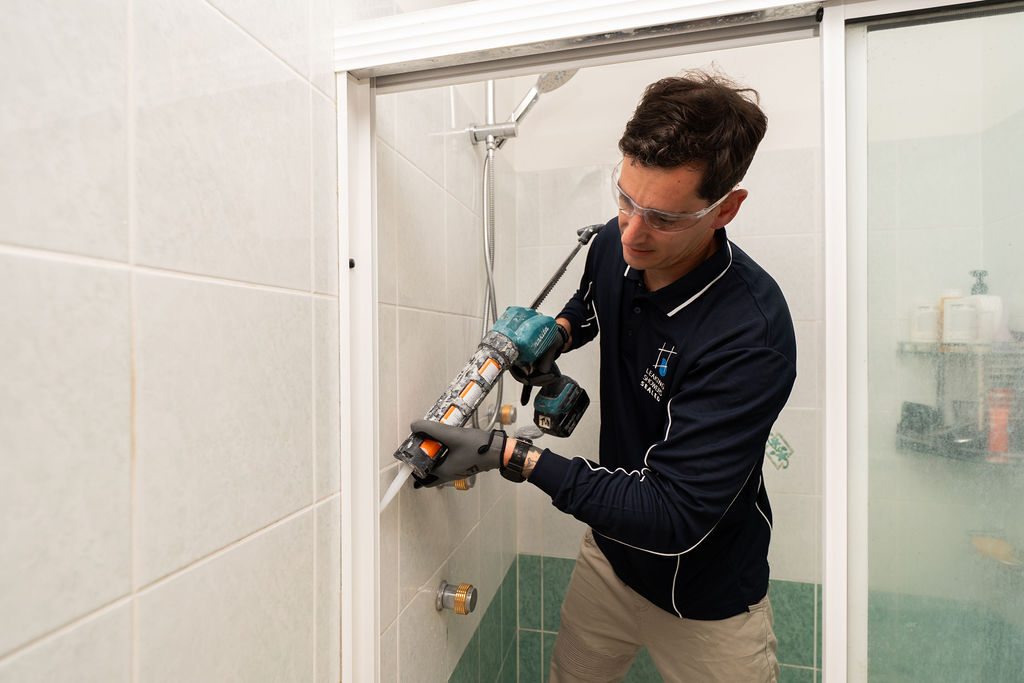
If There’s a Leaking Pipe, Drain, or Tap: Consult a Plumber
If the leak originates from the pipes, drain, or taps, a licensed plumber must address the issue first. We collaborate with plumbers for these repairs, and the shower can be resealed once the plumbing concerns have been resolved.
When the Membrane Behind the Tiles Has Failed: Engage a Licensed Waterproofer and Tiler
Typically, there is a waterproof membrane behind the tiles designed to catch any water that penetrates the surface. If this membrane has failed, it must be replaced by lifting the tiles, a task designated for a licensed waterproofer and tiler. Andreas’s licence covers waterproofing, as well as bath and shower resealing, enabling us to recognise the signs of a failed membrane. We will inform you of any costs before proceeding with a reseal.
If There’s a Leaking Shower Screen: Consult a Glazier
If water leaks from the silicone at the junction of the screen and tiles, replacing that silicone can often resolve minor leaks. If the screen frame itself is leaking, corroded, or improperly installed, it typically requires the expertise of a glazier or shower screen specialist. We can facilitate the removal of the screen as part of a reseal and coordinate its replacement with a glazier.
How to Manage Mould on Shower Grout Near a Leak
Persistent mould on grout and silicone often correlates with a leak behind the wall. While bleach and mould sprays can clean the surface, the mould resides within the grout, nourished by trapped water, leading to its recurrence. We remove the affected grout and replace it with epoxy grout, which does not absorb water like cement grout. For a more detailed comparison, see our article on epoxy grout versus cement grout.
How to Handle Leaks Behind Shower Walls in Rental Properties and Homes for Sale
If you are renting and notice dampness on the wall behind the shower, inform your property manager promptly. Addressing a small leak at the grout or silicone is significantly easier before water has the chance to spread over time. For landlords and property managers, the period between tenants is an ideal time to regrout, reseal, and deep clean the shower while the bathroom is unoccupied.
For real estate agents preparing a home for sale, regrouting, resealing, and deep cleaning the tiles and grout greatly enhances the bathroom’s appeal. Since the old grout and silicone are replaced, the shower will pass inspection by potential buyers’ building inspectors, provided that the leak originated from the grout and silicone. More information can be found on our page specifically for real estate agents and property managers.
Common Questions Regarding Shower Leaks Behind the Wall
Is It Feasible to Repair a Leak Behind the Shower Wall Without Removing Tiles?
Yes, if the water is entering through the grout and silicone, which is the most common cause. We can perform regrouting and resealing without removing the tiles. If the membrane behind the tiles has failed, however, tile removal is necessary.
Do Plumbers Handle Leaks Behind Shower Walls?
A plumber addresses leaks from pipes, drains, or taps located within the wall. If water seeps through the grout and silicone, the solution is regrouting and resealing instead.
How Long Does It Typically Take to Repair a Shower That Is Leaking Behind the Wall?
A complete shower seal typically takes around 4 to 5 hours on site, after which the shower can be used again after 24 hours, once the epoxy grout and silicone have fully cured.
What Warranty Is Offered with the Repair?
Our regrout and reseal services come with a 10-year Ardex product warranty and a 7-year workmanship warranty. The warranty details will be included in your quote after we assess the shower to ensure proper sealing.
How to Request a Free Quote for a Shower Leak Behind the Wall
If you have observed dampness on the wall behind your shower, a stain on the ceiling below, or if the grout and silicone have discoloured, please email photos of the floor, wall, and entire shower, along with the damp patch, to sales@leakingshowerssealed.com.au. We will respond within 24 hours. Alternatively, you can call us at 1300 815 512 or contact us to arrange a free quote. Provide details about the damp location and its appearance, and we will advise whether a shower reseal and regrout are suitable for your situation.
Leaking Showers Sealed has specialised in regrouting and resealing showers in Sydney since 2016. Andreas, the business owner, holds NSW contractor licence 89111C, which can be verified on the NSW Fair Trading public register. We are Ardex Academy accredited and have accumulated over 300 Google reviews across our three locations.
Original Article First Published At: Shower Leaking Behind the Wall? How to Tell, What Causes It and Who Fixes It
The Article: Shower Leaking Behind the Wall: Signs, Causes, and Solutions first appeared on https://writebuff.com
The post Shower Leaking Behind the Wall: Identify Causes and Fixes appeared first on Limits Of Strategy.
The Article Shower Leaking Behind the Wall: Causes and Solutions Explained found first on https://electroquench.com